


- 線の太さの変え方が分からない
- 線パネルの使い方を知りたい
そんな方にIllustratorの線の太さを変更する方法を紹介していきます。
目次
Illustratorのインストール
まだIllustratorを持っていない方は、公式サイトの無料体験がおすすめです。

Illustratorで線の太さを変更する方法
Illustratorで線の太さを変更するには、線パネルを使用することが多いです。
Illustratorの線パネルとは
線パネルは、パネル内にあります。
まずは線パネルの場所を確認しましょう。
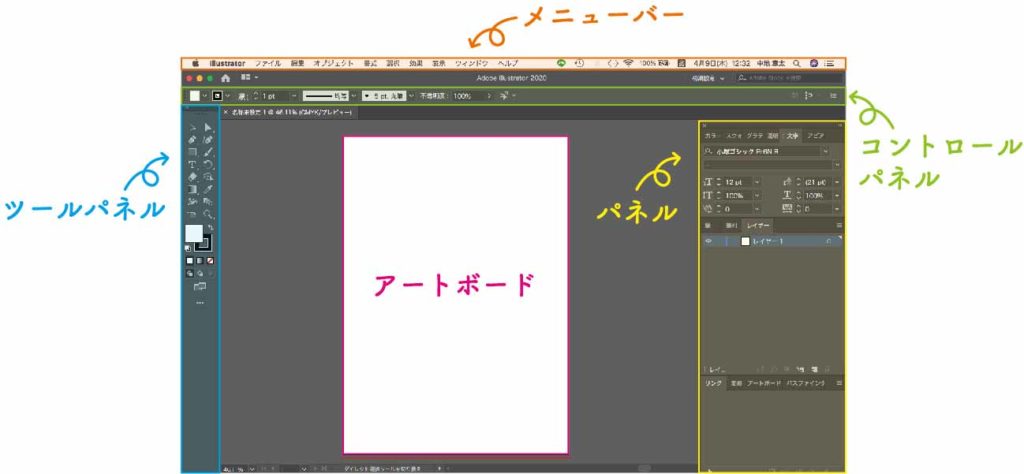
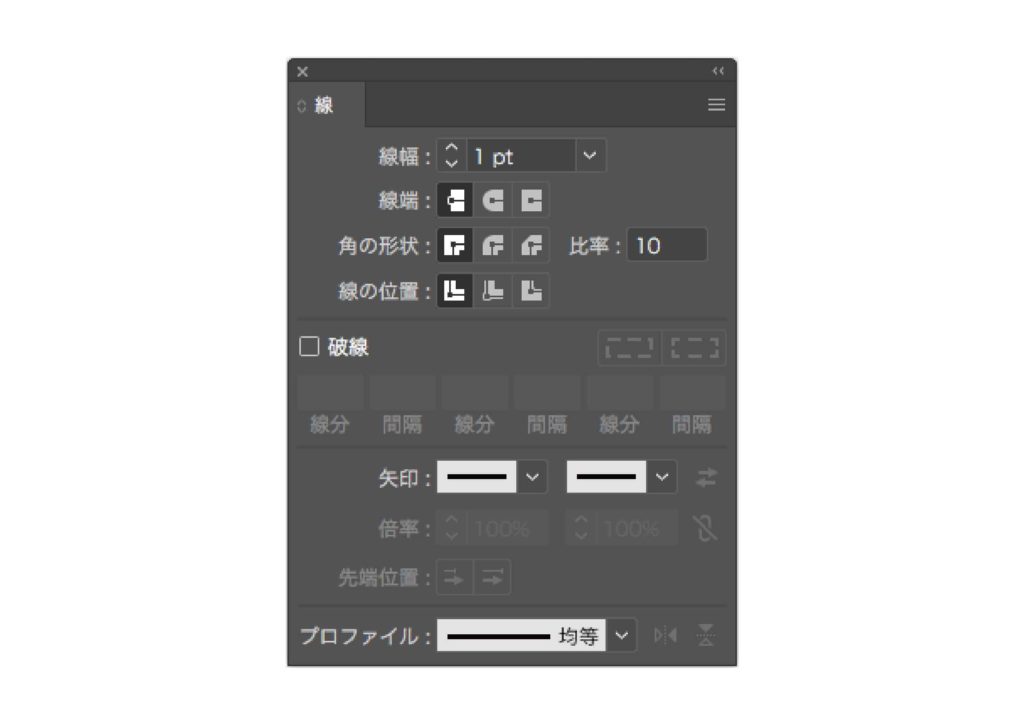
線パネルはIllustratorの線を編集する機能です。
※線パネルが表示されていない場合は、上部のウィンドウ→線で表示されます。
Illustratorで線の太さを変更する手順
⑴線パネルの線幅の数値を変更する
Illustratorで点線を作成する方法
⑴線を選択する
⑵線パネル内の破線にチェックを入れる
※線分や間隔の数値を調整すると、点線を調整できる
Illustratorの線パネルの使い方
線パネルでは、線の形状を変更することもできます。
色々な線の作り方を解説していきます。
線の先を丸くする方法
⑴線を選択する
⑵線パネル内の線端のアイコンをクリック
線を角丸にする方法
⑴オブジェクトを選択する
⑵角の形状のアイコンを角丸に変更する
角の形状を無くしたり、尖らせる方法
⑴オブジェクトを選択する
⑵比率の数値を調整
線を矢印にする方法
⑴線を選択する
⑵線パネル内の矢印の下三角をクリックして、矢印を選択
線の形状を変える方法
⑴線を選択する
⑵線パネル内のプロファイルから、任意の線の形状を選ぶ
Illustratorで線の太さを変更する方法まとめ
Illustratorの線を太くするには、線パネルを使用します。
線パネルが見当たらないなら、ウィンドウ→線で表示できます。

Illustratorの使い方がよく分からない。もっと勉強したい!
という方におすすめの本や講座をまとめているので、興味がある方は参考にどうぞ。
✔︎関連記事はこちら


この記事では、Illustratorで線の太さを変更する方法について解説しています。